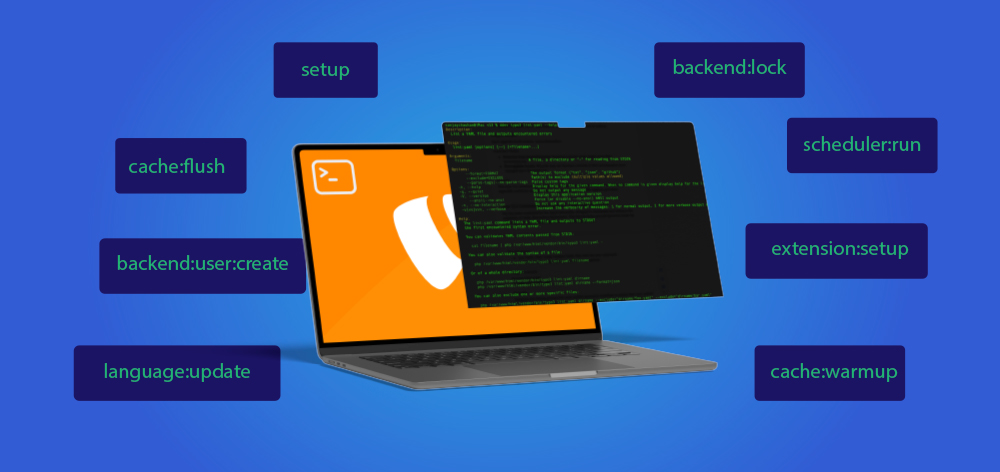
Hallo TYPO3-Fans! Wenn Sie auf der Suche nach einer Möglichkeit sind, Ihre TYPO3-Workflows zu beschleunigen, sich wiederholende Aufgaben zu automatisieren und mehr Kontrolle über die Wartung Ihrer Website zu erhalten, dann sind Sie hier genau richtig. In diesem Blog-Beitrag stellen wir Ihnen die wichtigsten TYPO3-Konsolenbefehle vor (einschließlich der TYPO3 Core CLI und der beliebten typo3_console extension). Außerdem werden wir die Grundlagen für den Zugriff auf die TYPO3-CLI und deren Verwendung erläutern.
Wenn Sie schon eine Weile mit TYPO3 arbeiten, haben Sie vielleicht das webbasierte Backend für viele administrative Aufgaben genutzt, wie z.B. das Löschen von Caches, das Aktualisieren von Erweiterungen oder das Ausführen von Datenbank-Upgrades. Aber wenn Ihre Projekte wachsen, kann die manuelle Bearbeitung dieser Aufgaben sehr zeitaufwändig werden.
An dieser Stelle kommt das TYPO3 Command-Line Interface (CLI) ins Spiel. Mit dem CLI können Sie Befehle direkt von Ihrem Terminal oder der Eingabeaufforderung aus ausführen. Dieser Ansatz ist:
- Schneller: Sie müssen nicht durch mehrere Backend-Module wie TYPO3 Scheduler navigieren.
- Skriptfähig: Einbindung in CI/CD-Pipelines für automatisierte Bereitstellungen.
- Leistungsstark: Einige Funktionen sind nur über CLI zugänglich (z. B. erweiterte Bereinigungsaufgaben).
Wenn Sie lokal oder über SSH auf einem Server arbeiten, öffnen Sie einfach Ihr Terminal und navigieren Sie zum Stammverzeichnis des TYPO3-Projekts. Dann können Sie die Befehle auf eine der folgenden Arten ausführen:
1. Composer-basierte Installation (am häufigsten)
vendor/bin/typo3 <command>
vendor/bin/typo3 <command>
2. Älterer/Alternativer Ansatz
typo3cms <command>
or
typo3 <command>
typo3cms <command>
or
typo3 <command>
Der genaue Name der ausführbaren Datei kann je nach TYPO3 Version und Dateisystem leicht variieren. Bei neueren TYPO3-Installationen ist vendor/bin/typo3 der Standardansatz.
Hier finden Sie 15 wichtige TYPO3 CLI-Befehle, um Ihre täglichen Aufgaben zu vereinfachen. Jeder Befehl folgt im Allgemeinen dem gleichen Syntaxmuster:
vendor/bin/typo3 <command> [arguments] [options]
vendor/bin/typo3 <command> [arguments] [options]
- cache:flush
- Zweck: Leeren aller TYPO3-Caches.
- Verwendung: vendor/bin/typo3 cache:flush
- Tipp: Verwenden Sie diese Funktion immer dann, wenn Sie Caching-Probleme vermuten oder wenn Sie neue Erweiterungen installiert haben.
- cache:warmup
- Zweck: Caches vorladen, um die Leistung zu verbessern.
- Verwendung: vendor/bin/typo3 cache:warmup
- Tipp: Führen Sie es nach der Bereitstellung aus, um die Benutzerfreundlichkeit zu verbessern.
- extension:setup
- Zweck: Initialisieren oder Aktualisieren von TYPO3-Erweiterungen.
- Verwendung: vendor/bin/typo3 extension:setup
- Tipp: Perfekt, nachdem Sie Ihre composer.json-Abhängigkeiten angepasst haben.
- scheduler:run
- Zweck: Ausführen von TYPO3-Scheduler-Aufgaben bei Bedarf.
- Verwendung: vendor/bin/typo3 scheduler:run
- Tipp: Ein Lebensretter, wenn Ihr Cron-Job fehlschlägt oder wenn Sie Aufgaben manuell auslösen wollen.
- upgrade:run
- Zweck: Ausführen von Upgrade-Assistenten (besonders nützlich bei Versions-Upgrades).
- Verwendung: vendor/bin/typo3 upgrade:run
- Tipp: Sichern Sie immer Ihre DB, bevor Sie Upgrade-Assistenten ausführen!
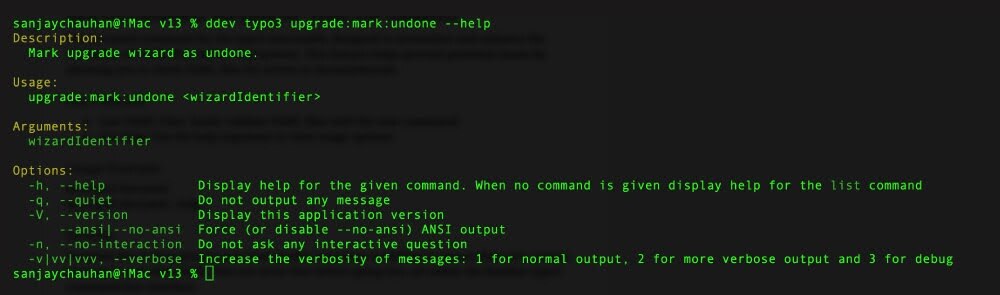
- upgrade:mark:undone
- Zweck: Einen bestimmten Upgrade-Assistenten rückgängig machen.
- Verwendung: vendor/bin/typo3 upgrade:mark:undone <wizardIdentifier>
- Tipp: Hilfreich, wenn Sie den Assistenten erneut ausführen müssen oder wenn etwas schief gelaufen ist.
- Einrichtung
- Zweck: Erneutes Ausführen von Setup-Aufgaben (ähnlich den Schritten des Basis-Installationsprogramms).
- Verwendung: vendor/bin/typo3 setup
- Tipp: Ideal für neue Projekte oder nach Änderungen der Umgebungskonfiguration.
- backend:lock
- Zweck: Sperrt das TYPO3-Backend für Wartungsarbeiten.
- Verwendung: vendor/bin/typo3 backend:lock --reason="Wartungsmodus"
- Tipp: Halten Sie Redakteure fern, während Sie größere Updates oder Datenbankänderungen durchführen.
- backend:user:create
- Zweck: Erstellen eines Backend-Benutzers über die CLI.
- Verwendung: vendor/bin/typo3 backend:user:create <Benutzername> <Passwort> [--admin]
- Tipp: Erstellen Sie sofort einen Benutzer, wenn Sie nicht auf das Backend zugreifen können oder Ihre Anmeldedaten vergessen haben.
- cleanup:deletedrecords
- Zweck: Dauerhaftes Löschen von soft-deleted records.
- Verwendung: vendor/bin/typo3 cleanup:deletedrecords
- Tipp: Routinemäßige Datenbankbereinigung hält die Datenbank schlank und effizient.
- cleanup:missingrelations
- Zweck: Fehlende Verweise in der Datenbank aufspüren und beheben.
- Verwendung: vendor/bin/typo3 cleanup:missingrelations --dry-run
- Tipp: Führen Sie immer zuerst einen --dry-run durch, um die Änderungen zu sehen, die vorgenommen werden.
- cleanup:verwaiste Datensätze
- Zweck: Verwaiste Datensätze entfernen (Daten ohne gültige Referenzen).
- Verwendung: vendor/bin/typo3 cleanup:orphanrecords
- Tipp: Sehr nützlich nach großen Migrationen oder Löschungen von Inhalten.
- cleanup:localprocessedfiles
- Zweck: Nicht verwendete verarbeitete Dateien aus typo3temp entfernen.
- Verwendung: vendor/bin/typo3 cleanup:localprocessedfiles
- Tipp: Gibt Plattenplatz frei und verbessert die Leistung.
- sprache:aktualisieren
- Zweck: Aktualisieren von TYPO3-Sprachpaketen vom Übersetzungsserver.
- Verwendung: vendor/bin/typo3 language:update <SpracheSchlüssel>
- Tipp: Halten Sie Ihre mehrsprachige Website mit den neuesten Übersetzungen auf dem neuesten Stand.
- referenzindex:update
- Zweck: Den Referenzindex von TYPO3 neu erstellen.
- Verwendung: vendor/bin/typo3 referenceindex:update
- Tipp: Eine schnelle Lösung für Probleme im Zusammenhang mit Datensatzverknüpfungen oder internen Referenzen.
Zusätzlich zu den Kernbefehlen bietet die typo3_console-Erweiterung von Helmut Hummel zusätzliche Befehle, die Ihren Arbeitsablauf beschleunigen können. Viele Entwicklungsteams verlassen sich auf diese Befehle für automatisierte Bereitstellungen, DevOps-Aufgaben und erweiterte Wartung. Hier sind ein paar Highlights:
- database:updateschema
- Zweck: Automatische Anwendung von DB-Schemaänderungen.
- Verwendung: vendor/bin/typo3 database:updateschema
- Warum das gut ist: Keine manuellen DB-Vergleiche mehr - ideal für CI-Pipelines.
- install:fixfolderstructure
- Zweck: Sicherstellung der korrekten Ordnerstruktur und -berechtigungen.
- Verwendung: vendor/bin/typo3 install:fixfolderstructure
- Warum es cool ist: Eine große Zeitersparnis beim Einrichten neuer Server.
- backend:lockforeditors
- Zweck: Redakteure aussperren, während Administratoren frei bleiben.
- Verwendung: vendor/bin/typo3 backend:lockforeditors --reason="Inhalt einfrieren"
- Warum das gut ist: Granulare Kontrolle während des Einfrierens von Inhalten oder teilweiser Wartung.
- cache:flushtags
- Zweck: Leeren von Caches nach bestimmten Tags.
- Verwendung: vendor/bin/typo3 cache:flushtags --tags="pages,tt_content"
- Warum das gut ist: Gezieltes Leeren des Caches für partielle Rollouts oder zur Fehlerbehebung.
- konfigurieren:einstellen
- Zweck: Setzen der TYPO3-Konfiguration über CLI (Systemkonfiguration usw.).
- Verwendung: vendor/bin/typo3 configuration:set SYS/displayErrors 1
- Warum das gut ist: Aktualisieren Sie die Systemeinstellungen, ohne sich mit Konfigurationsdateien herumschlagen zu müssen.
- frontend:asseturl
- Zweck: Öffentliche URLs für Frontend-Assets generieren.
- Verwendung: vendor/bin/typo3 frontend:asseturl --file="EXT:myext/Resources/Public/Css/styles.css"
- Warum es cool ist: Praktisch für Debugging oder fortgeschrittene Deployment-Setups mit CDN.
Einen benutzerdefinierten TYPO3 CLI-Befehl zu erstellen ist einfacher , als Sie vielleicht denken. Hier ist eine kurze Schritt-für-Schritt-Anleitung:
Schritt 1. Erstellen Sie eine Befehlsklasse
Fügen Sie in Ihrer Extension (z.B. EXT:my_extension) eine PHP-Klasse hinzu, die den Basisbefehl von Symfony erweitert:
<?php
declare(strict_types=1);

namespace Vendor\MyExtension\Command;

use Symfony\Component\Console\Input\InputInterface;
use Symfony\Component\Console\Output\OutputInterface;
use TYPO3\CMS\Core\Console\Command\BaseCommand;

class MyCustomCommand extends BaseCommand
{
    protected function configure()
    {
        $this->setDescription('This is my custom CLI command.')
             ->setHelp('More details about what the command does...');
    }

    protected function execute(InputInterface $input, OutputInterface $output): int
    {
        $output->writeln('Hello from MyCustomCommand!');
        // Add your custom logic here...

        return 0; // 0 indicates a successful run
    }
}
Schritt 2. Registrieren des Befehls
Für TYPO3 v10 und höher können Sie Ihren Befehl über Services.yaml im Konfigurationsordner Ihrer Extension registrieren:
services:
  Vendor\MyExtension\Command\MyCustomCommand:
    tags:
      - name: 'console.command'
services:
  Vendor\MyExtension\Command\MyCustomCommand:
    tags:
      - name: 'console.command'
Schritt 3. Ausführen und Testen
Wechseln Sie zu Ihrem Terminal und versuchen Sie es:
vendor/bin/typo3 myextension:mycustomcommand
vendor/bin/typo3 myextension:mycustomcommand
Wenn alles korrekt eingerichtet ist, sollten Sie die Ausgabemeldung "Hallo von MyCustomCommand!" sehen.
Schritt 4. Verfeinern & Automatisieren
- Fügen Sie Argumente oder Optionen zu Ihrem Befehl hinzu (z. B. ->addArgument('Pfad')).
- Integrieren Sie den Befehl in CRON-Jobs, Deployment-Skripte oder führen Sie ihn bei Bedarf manuell aus.
Bonus: Wenn Sie mit einer älteren Version von TYPO3 arbeiten, können Sie immer noch Extbase-Befehlssteuerungen verwenden, aber das Konzept ist ähnlich - definieren Sie Befehle, registrieren Sie sie, und führen Sie sie aus.
- Verwenden Sie --dry-run: Testen Sie Bereinigungs- oder destruktive Befehle immer im Trockenlaufmodus, falls verfügbar.
- Automatisieren Sie mit CRON: Mit CRON-Aufträgen können Sie Befehle (wie scheduler:run) regelmäßig planen.
- Alles protokollieren: Führen Sie Protokolle Ihrer CLI-Befehle und -Ausgaben für die Fehlersuche.
- Sperren Sie das Backend: Verwenden Sie backend:lock oder backend:lockforeditors, um unerwartete Änderungen während der Wartung zu verhindern.
- Versionskompatibilität prüfen: Einige Befehle unterscheiden sich zwischen verschiedenen TYPO3 Versionen. Lesen Sie immer die Dokumentation für Ihr spezifisches Setup.
Kurz gesagt, die Beherrschung der TYPO3-Befehlszeile kann Ihre Produktivität enorm steigern. Vom Flushen des Caches über das Anlegen von Backend-Benutzern bis hin zu erweiterten Bereinigungsaufgaben - die Kommandozeile bietet Geschwindigkeit, Konsistenz und mühelose Automatisierung. Kombinieren Sie sie mit typo3_console für noch leistungsfähigere DevOps-freundliche Funktionen.
Sind Sie bereit, tiefer einzutauchen? Experimentieren Sie mit ein paar Befehlen in Ihrer lokalen Umgebung, integrieren Sie sie in Ihre Deployment-Pipeline oder erstellen Sie einen eigenen Befehl für eine sich wiederholende Aufgabe, die Sie schon immer gefürchtet haben. Sie werden manuelle Backend-Klicks nie wieder auf dieselbe Weise betrachten!
Haben Sie irgendwelche Lieblings-CLI-Befehle oder Profi-Tipps? Teilen Sie Ihre Gedanken unten mit. Wenn Sie diesen Leitfaden hilfreich fanden, können Sie ihn gerne mit anderen TYPO3-Fans teilen!
Viel Spaß beim Coding und CLI-ing!


Reading the blog on TYPO3 CLI commands was really helpful. I learned a lot about using the terminal for quicker tasks. The guide was simple to follow, and now I can manage my TYPO3 site more efficiently.